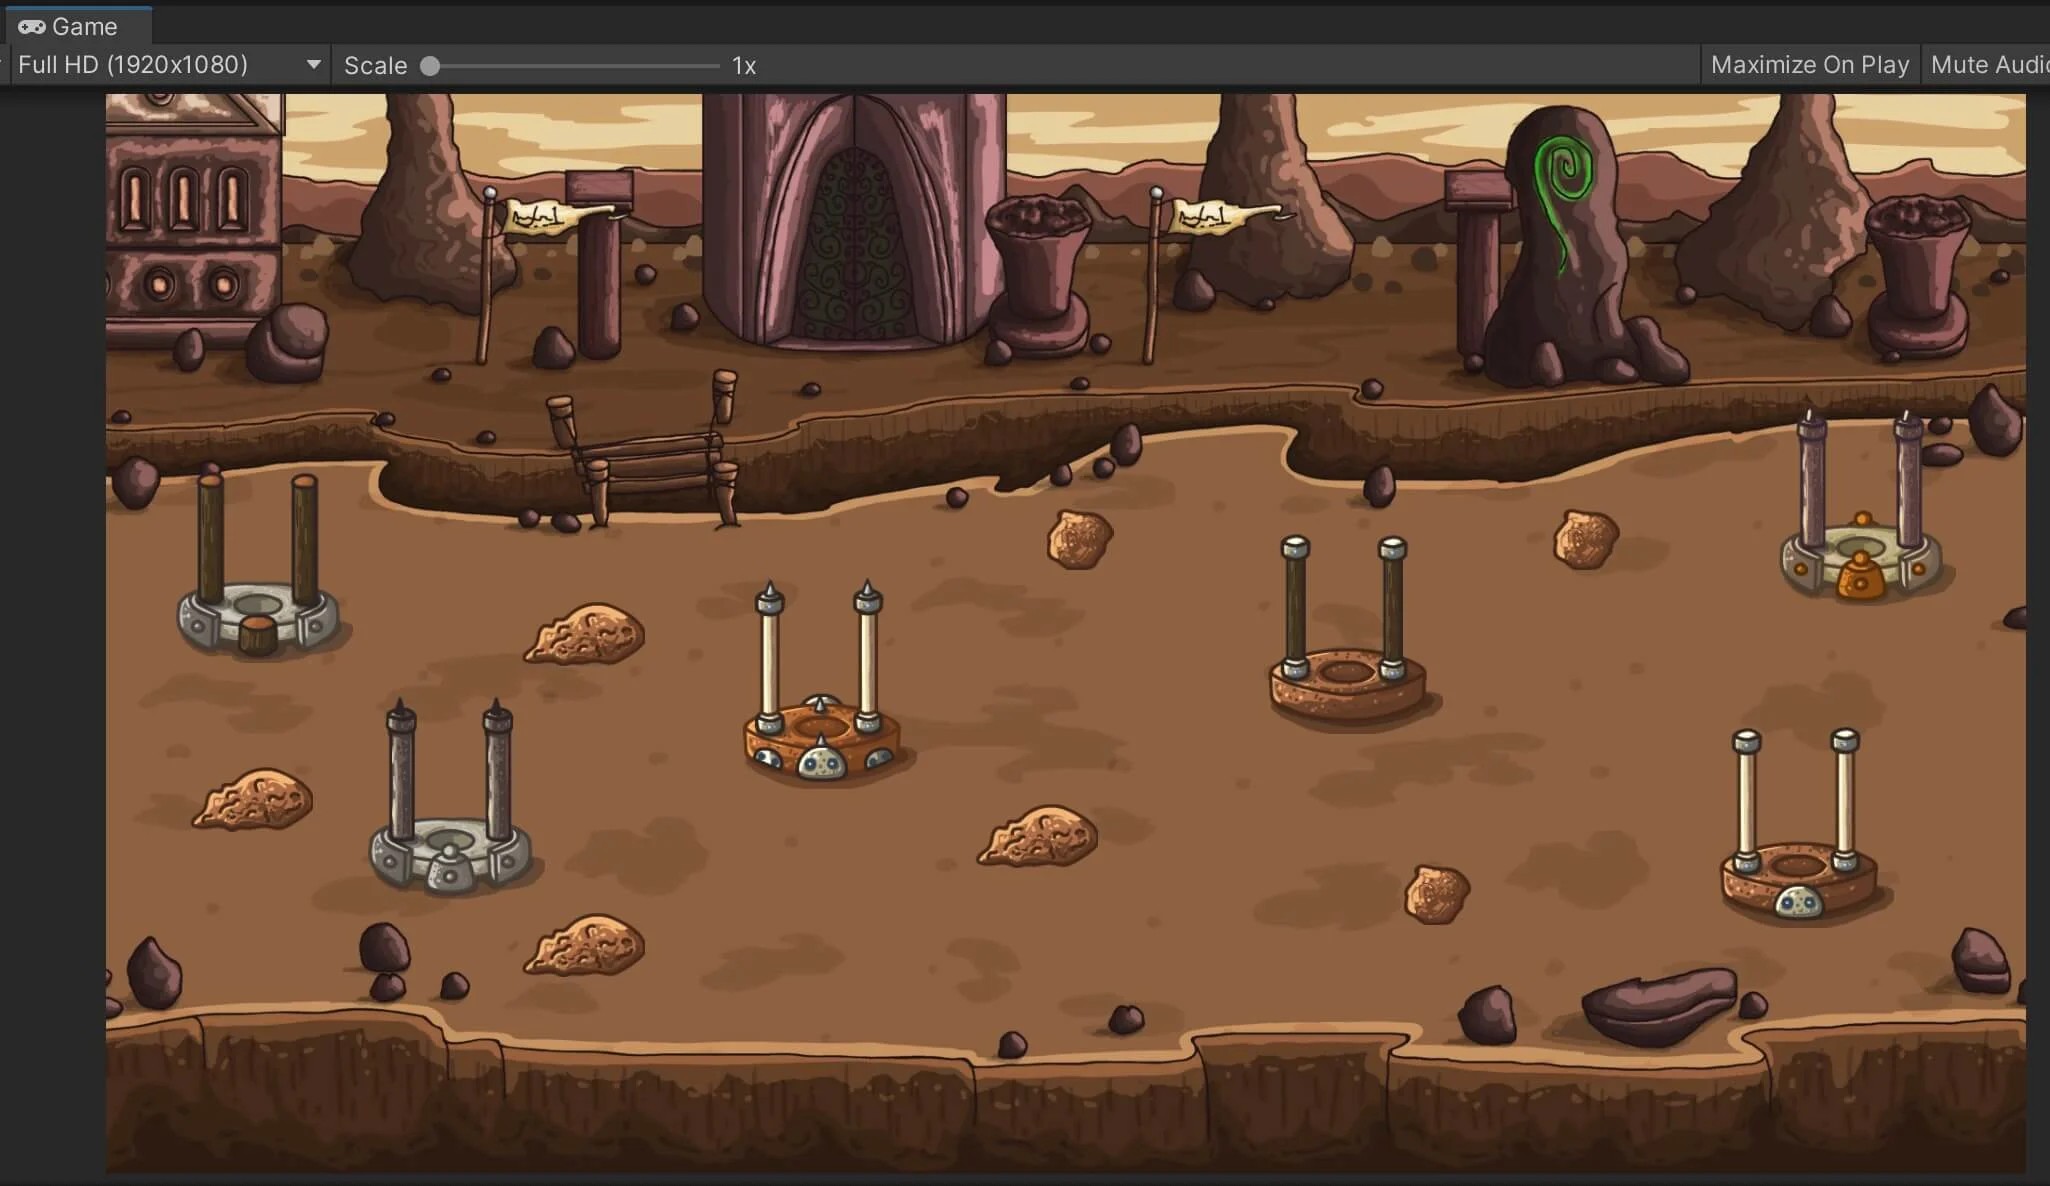
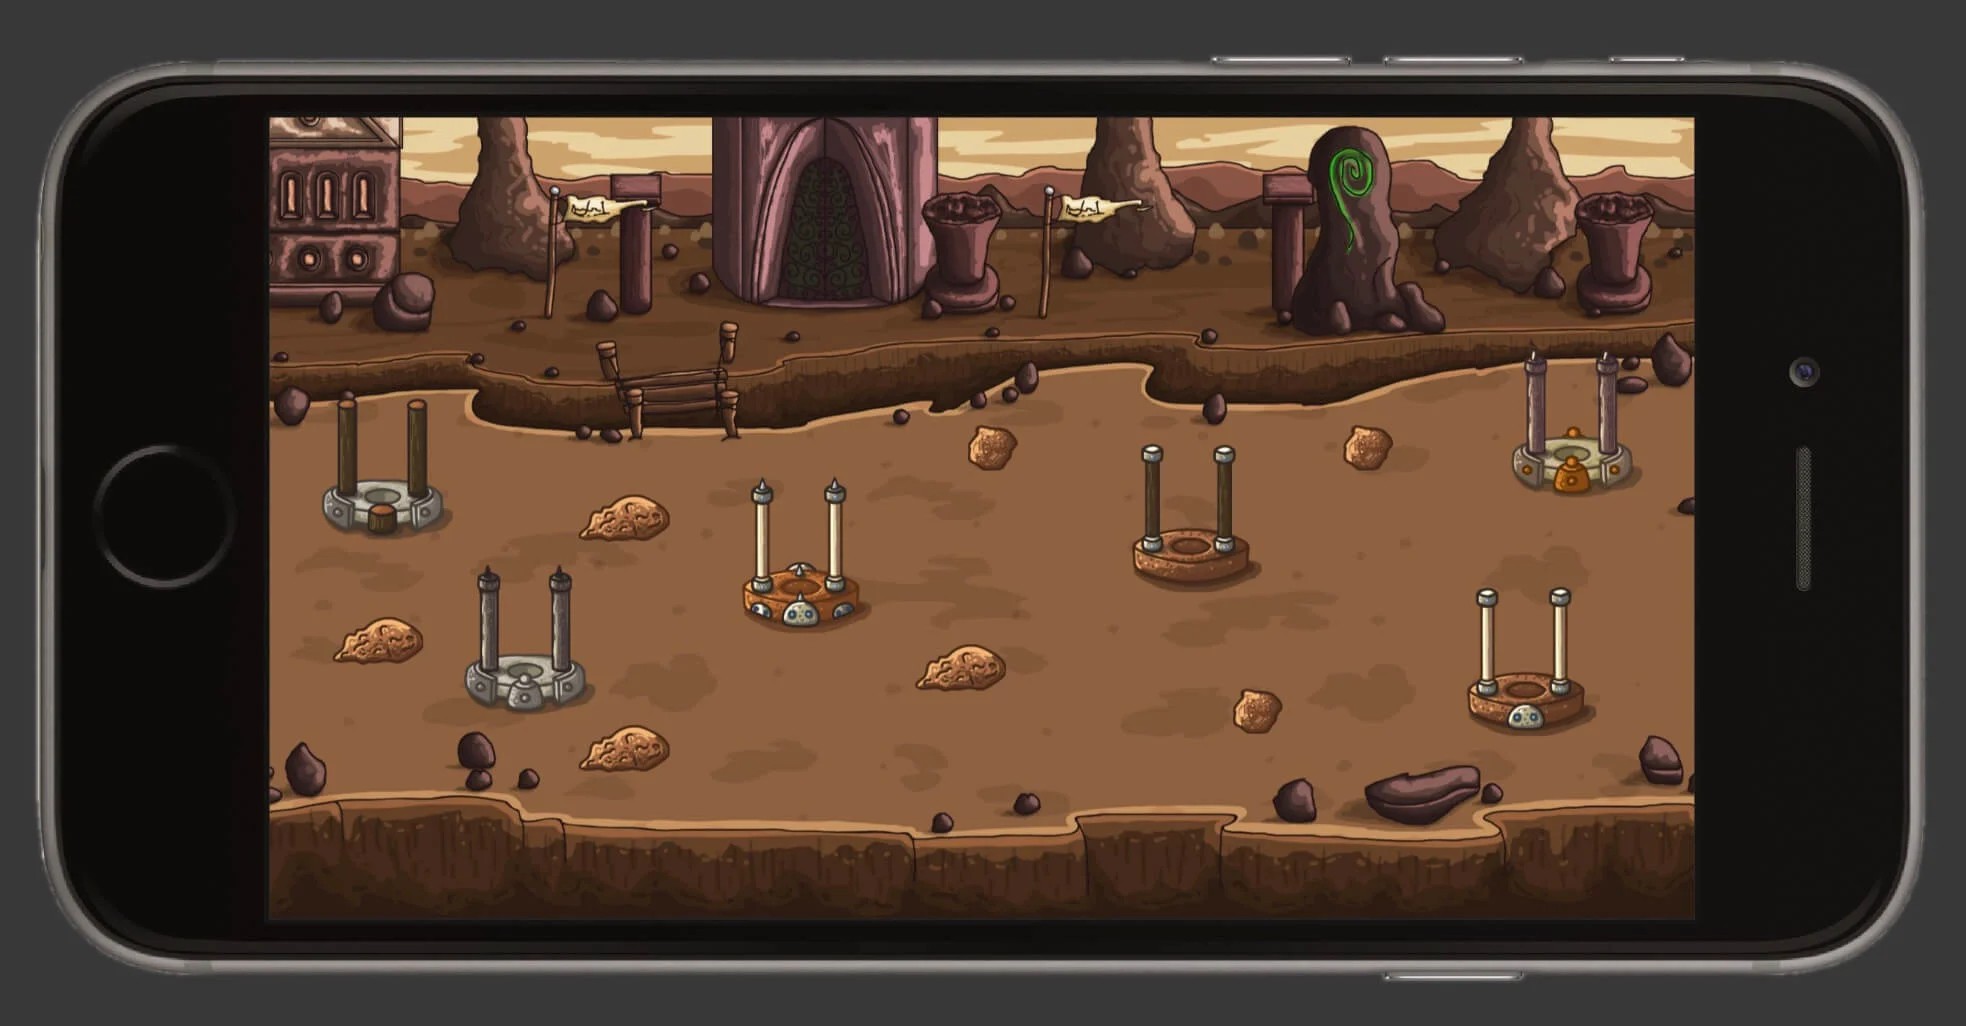
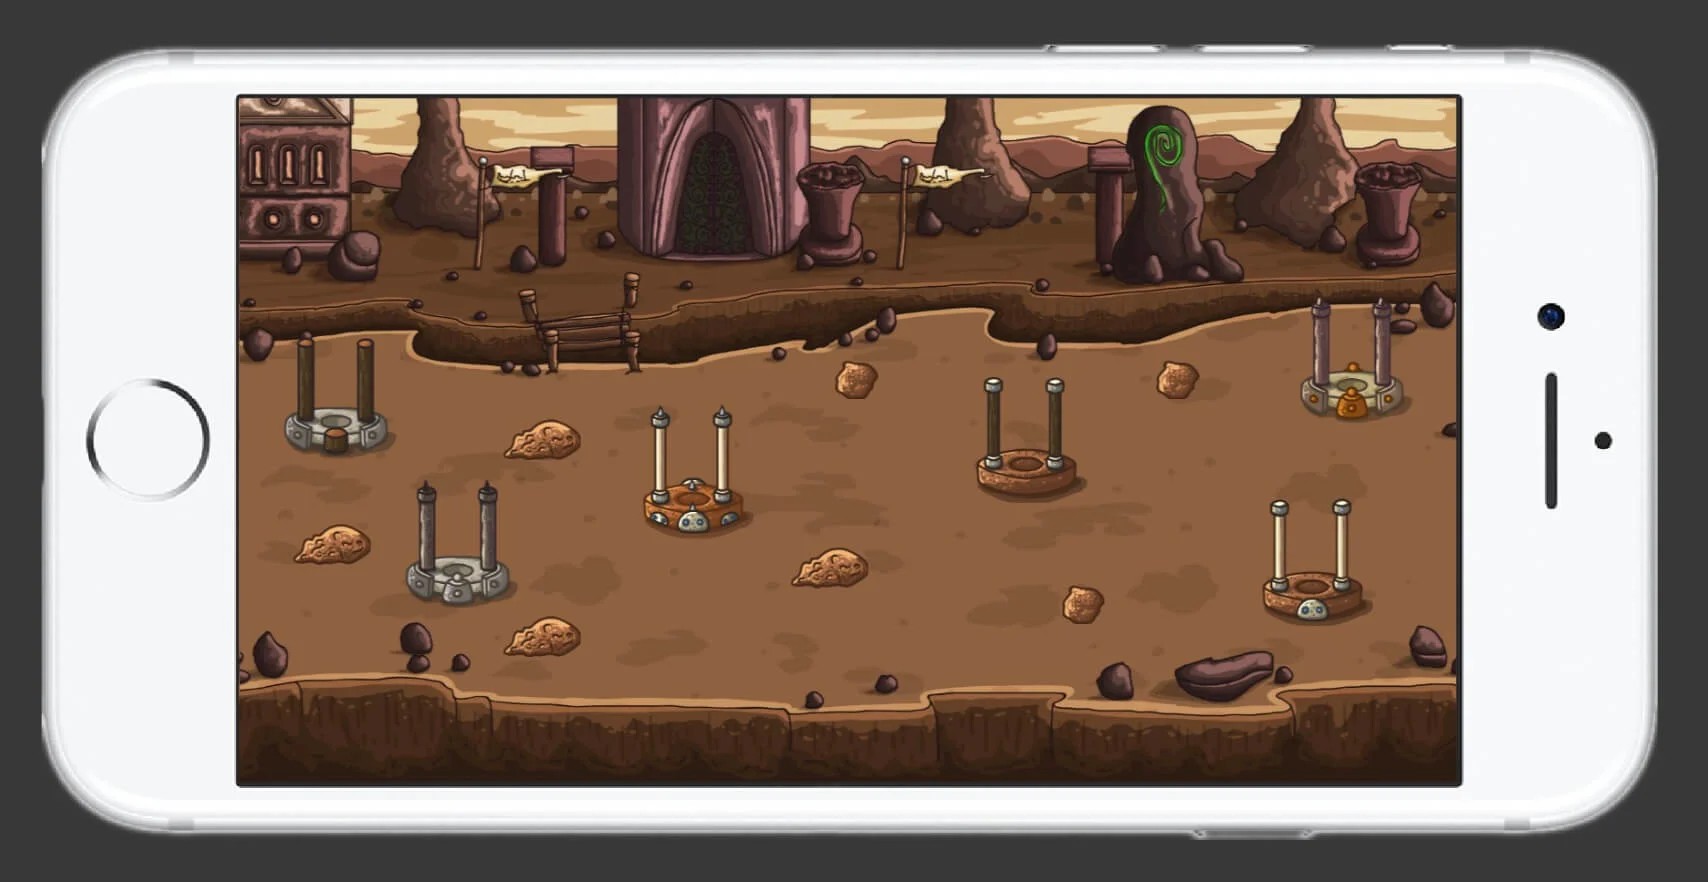
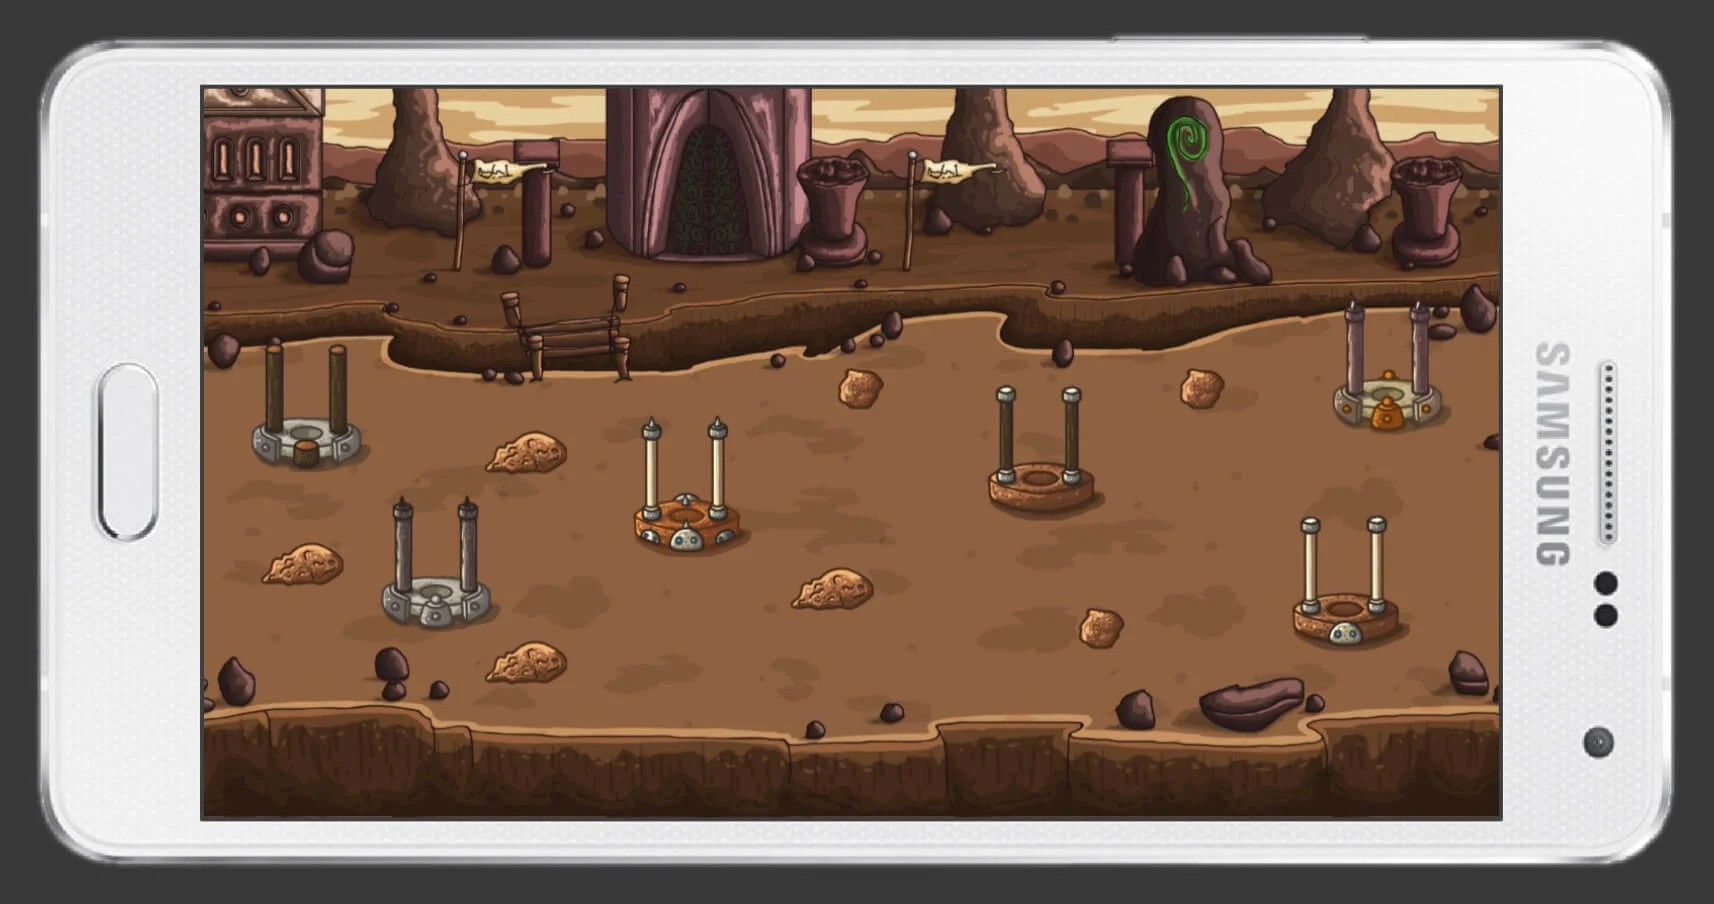
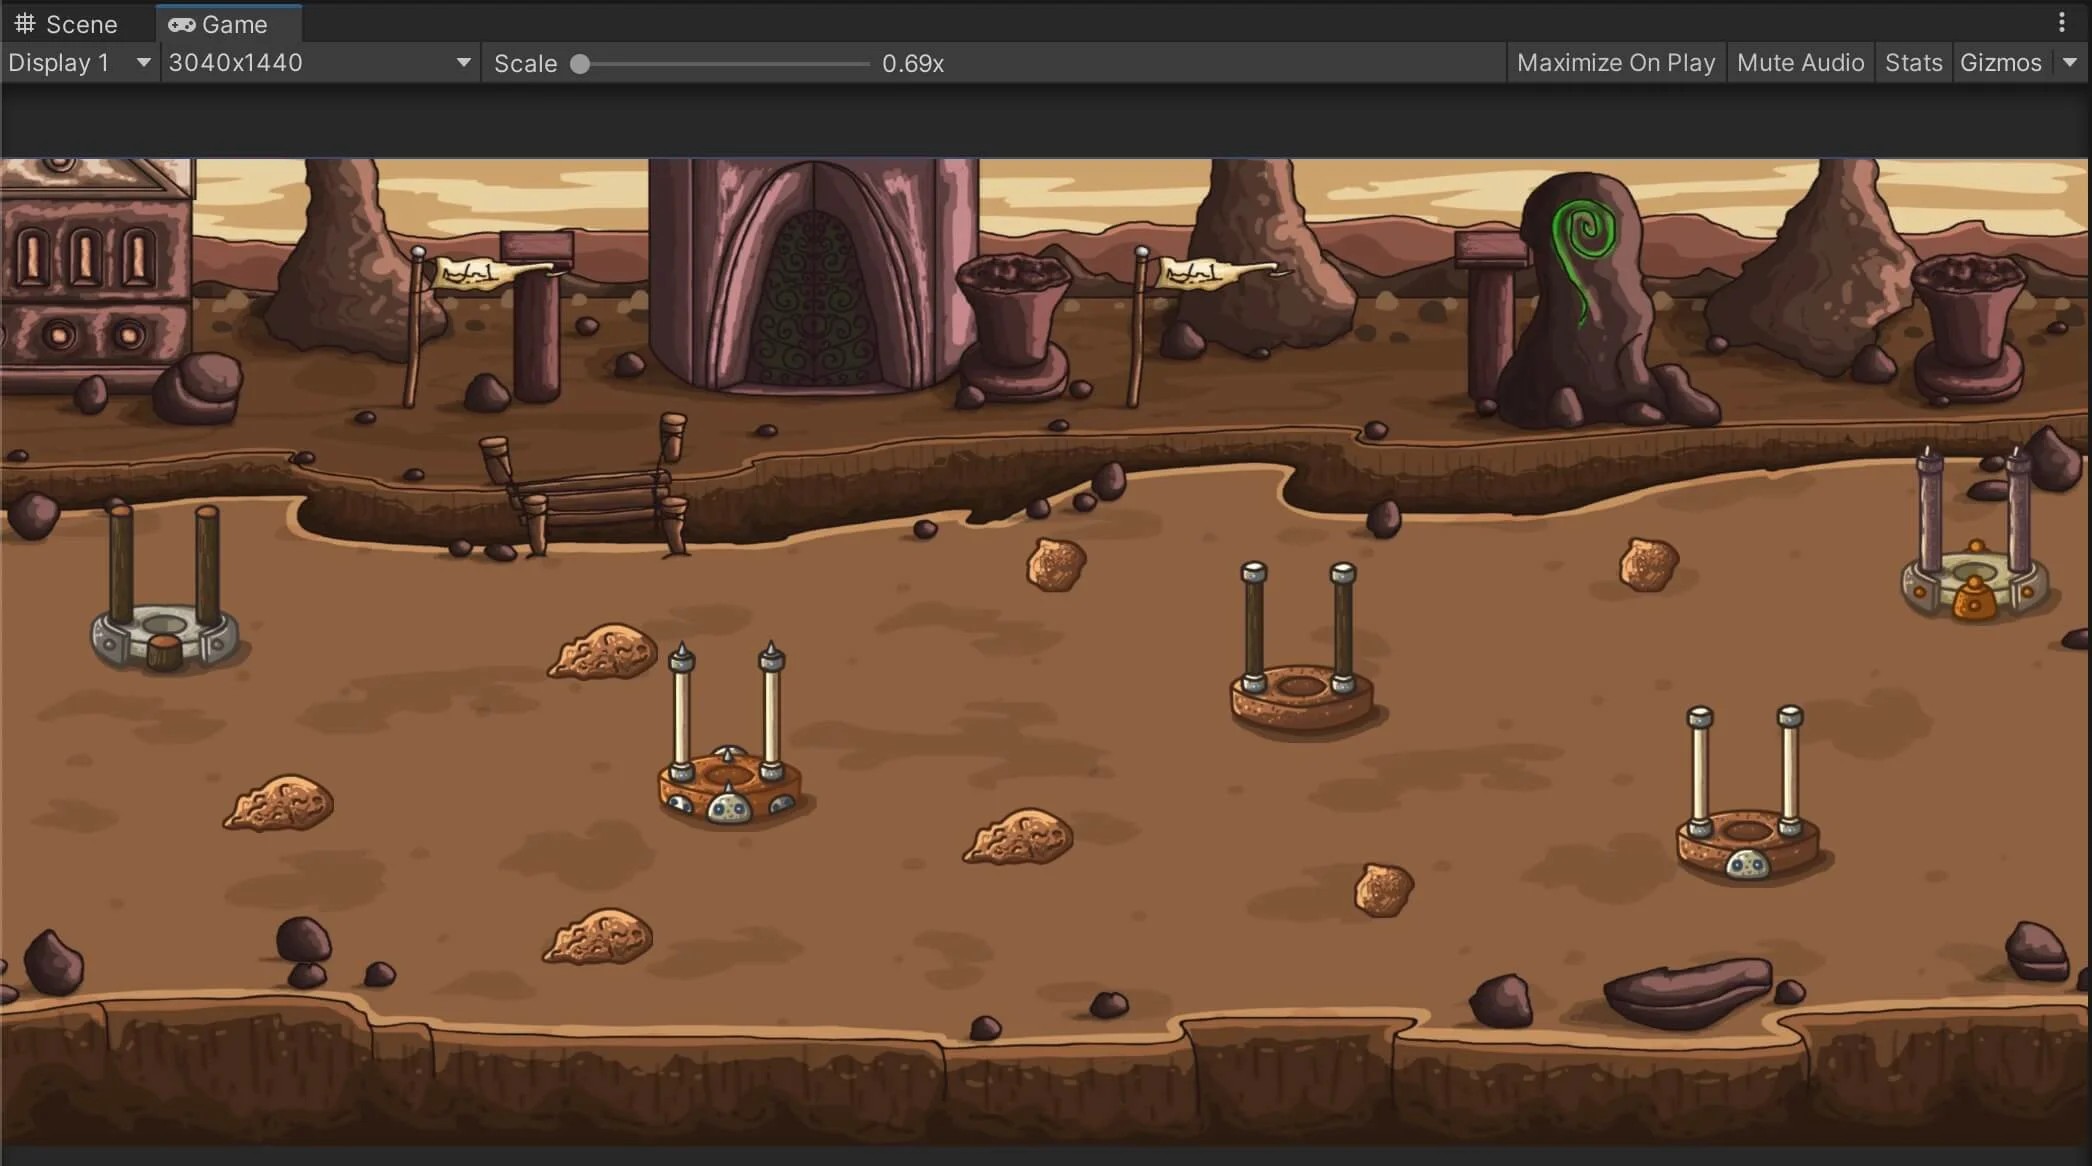
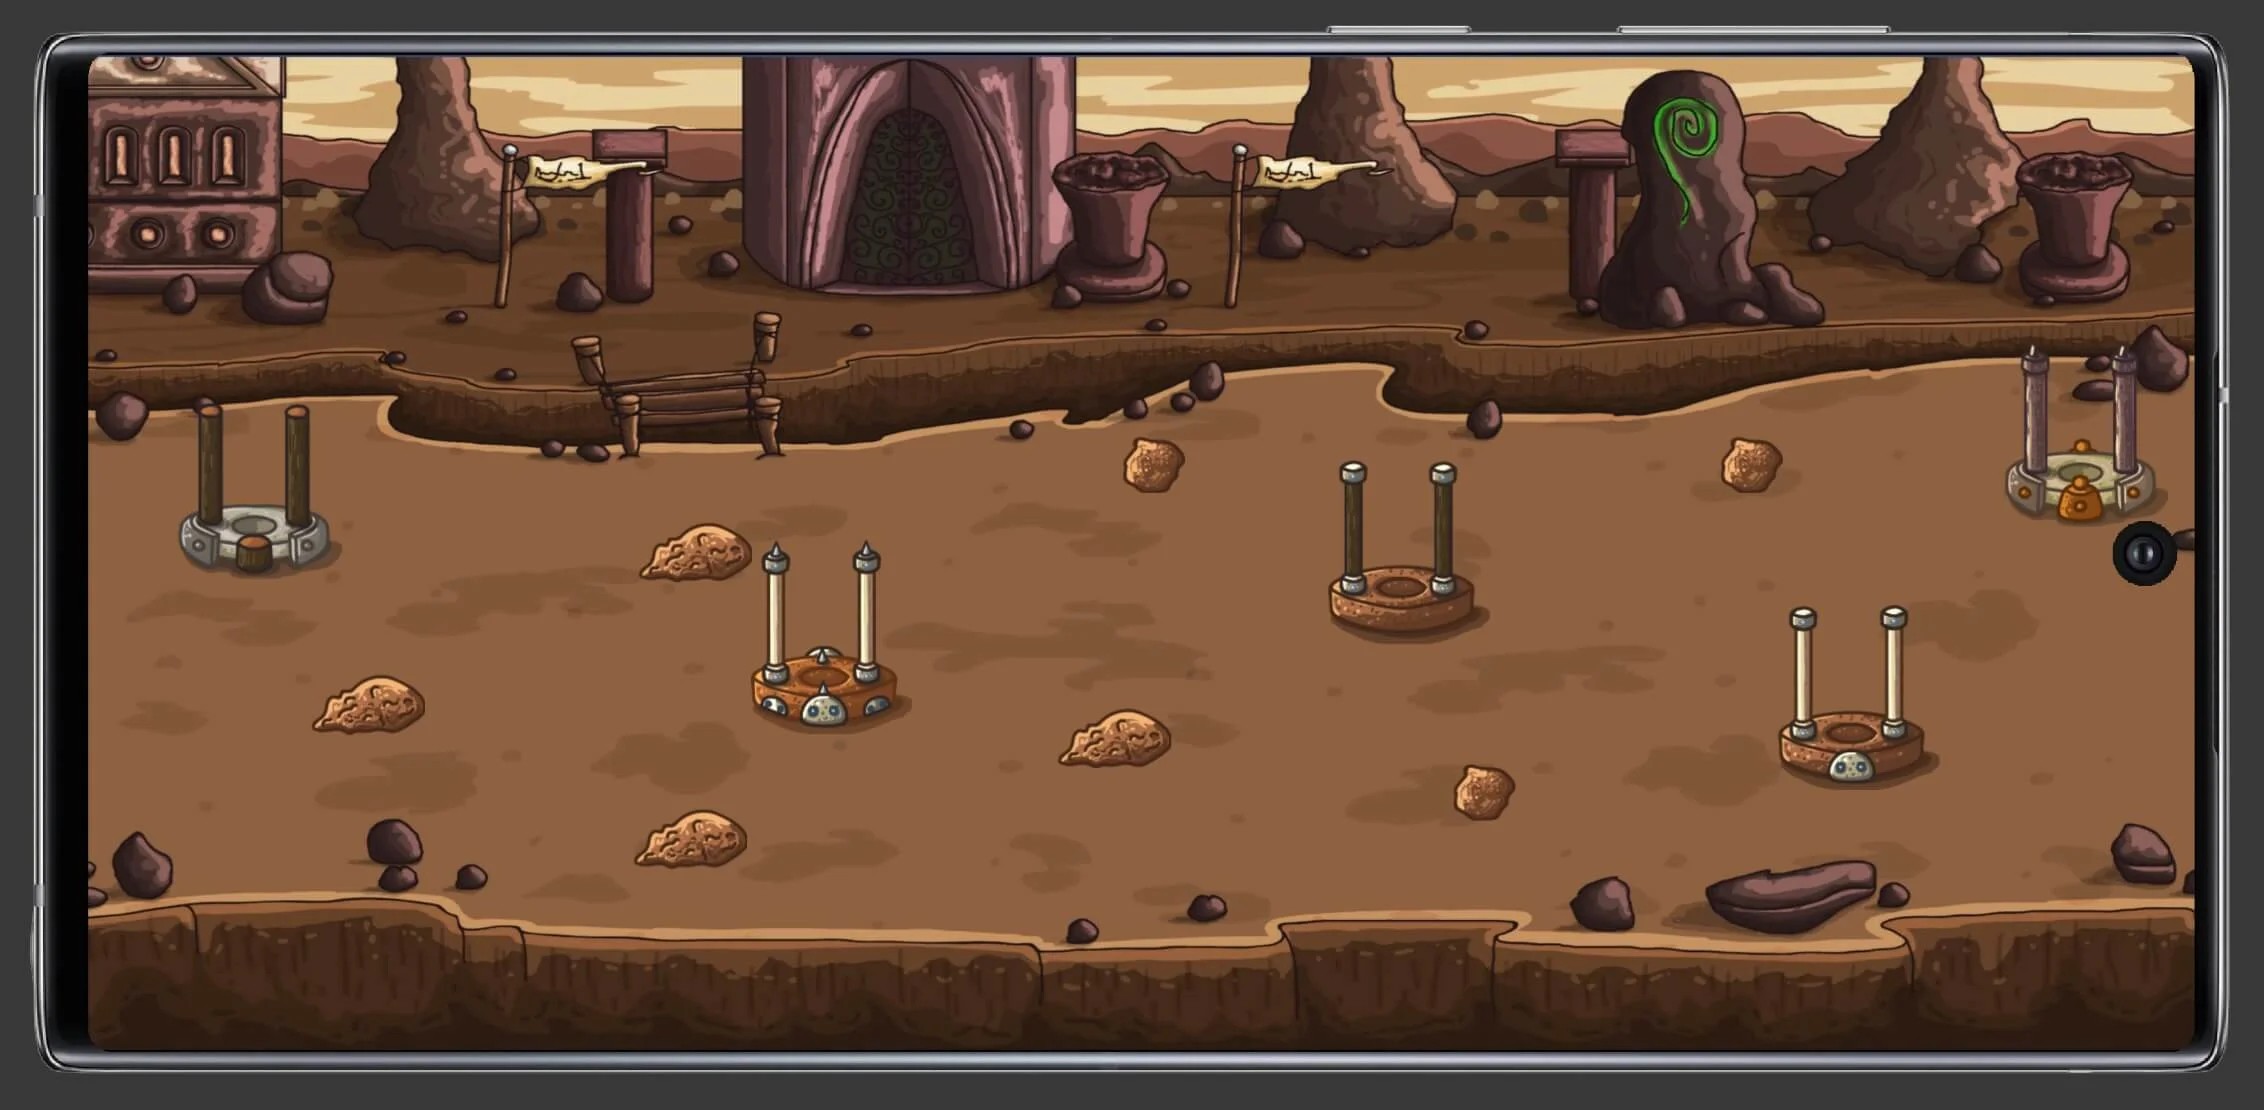
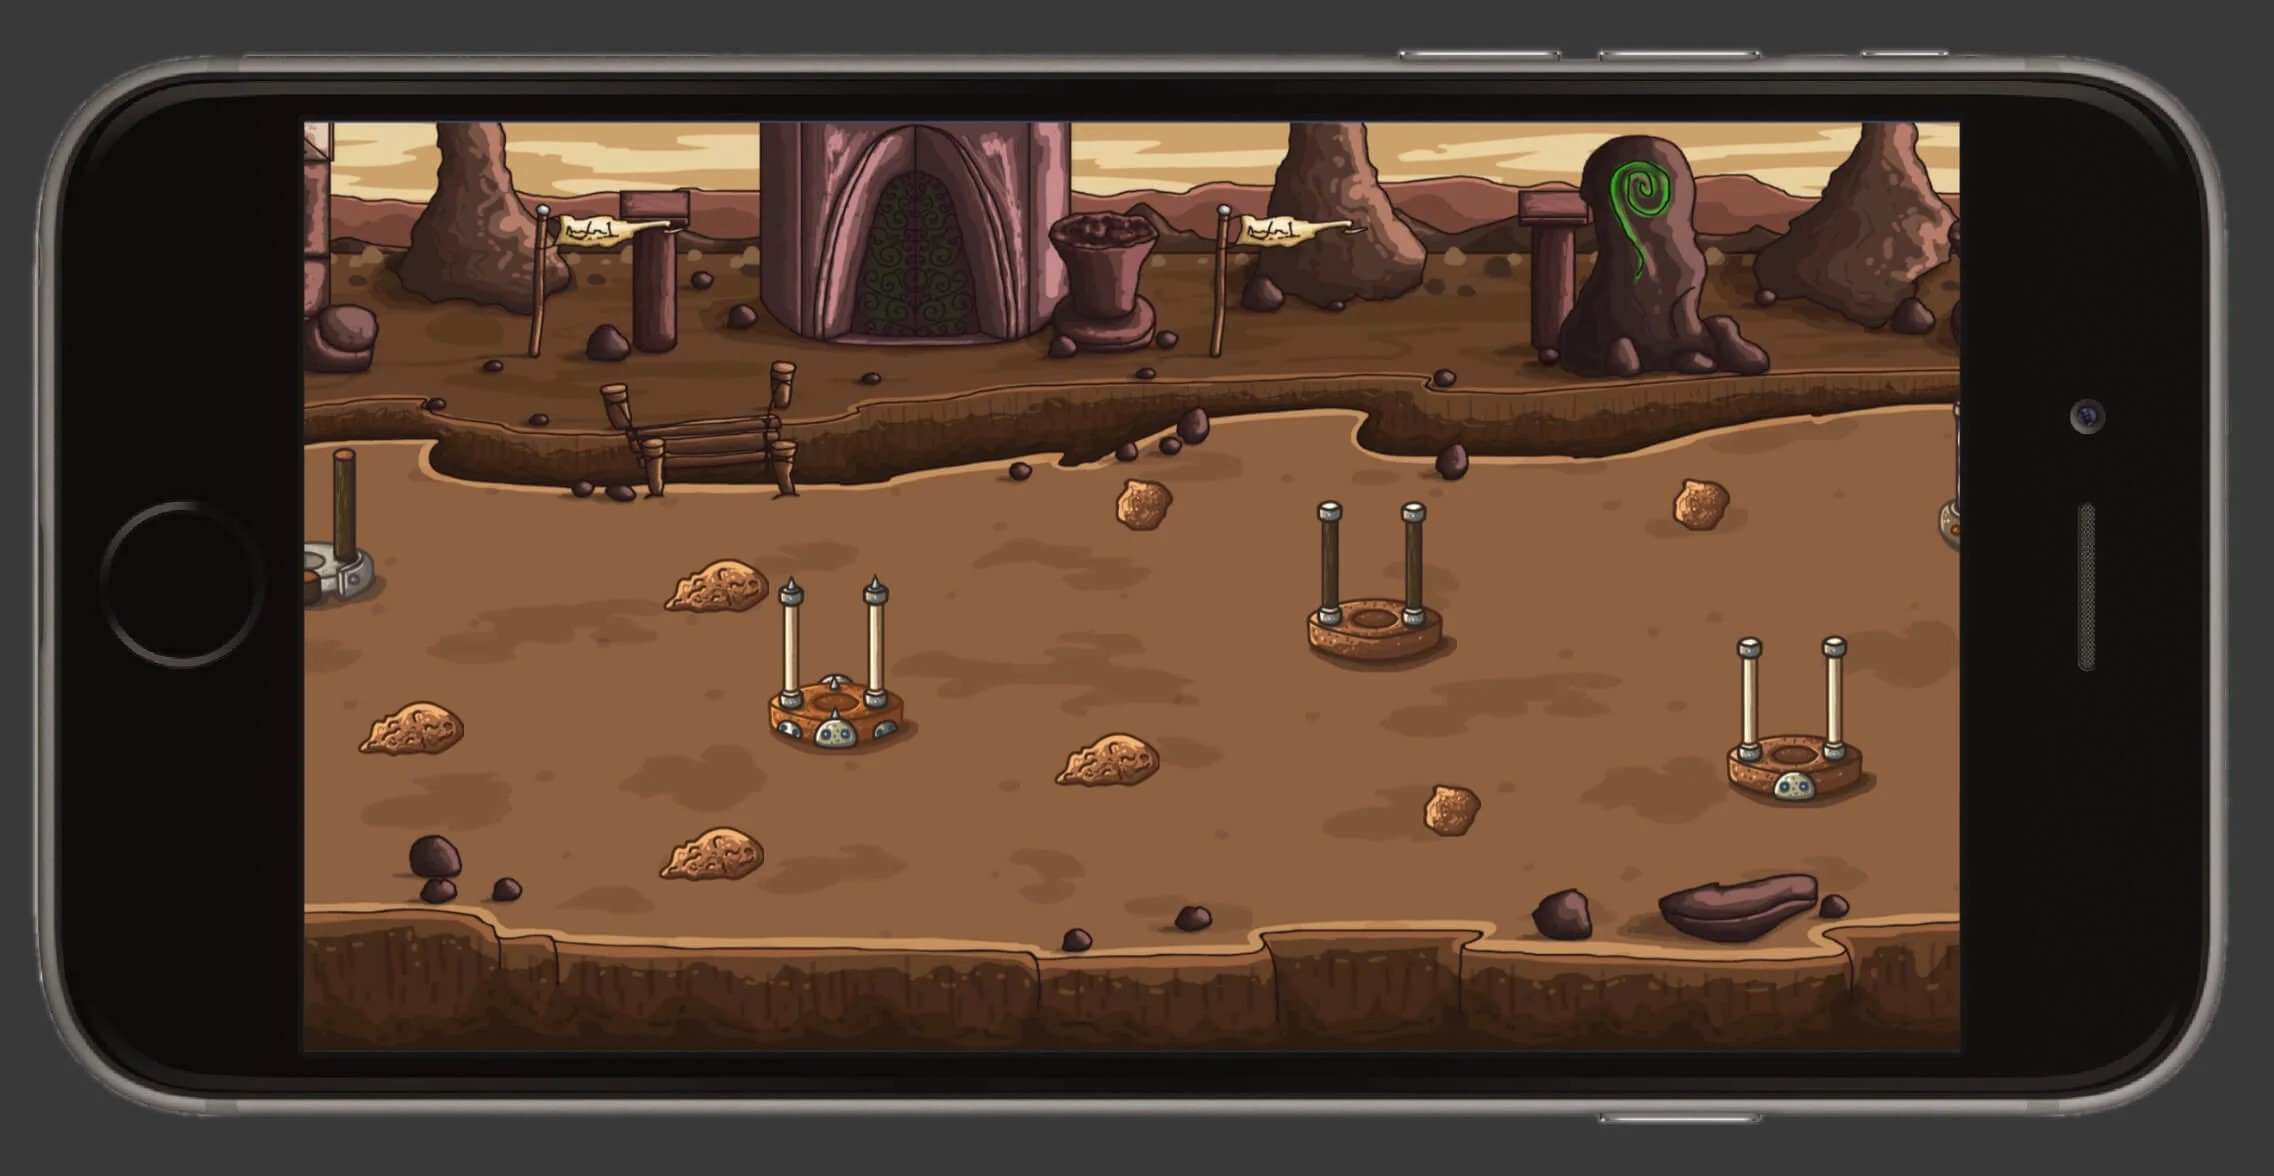
using UnityEngine; publicclassScaleToFitScreen : MonoBehaviour{ private SpriteRenderer sr; privatevoidStart() { sr = GetComponent<SpriteRenderer>(); // world height is always camera's orthographicSize * 2 float worldScreenHeight = Camera.main.orthographicSize * 2; // world width is calculated by diving world height with screen heigh // then multiplying it with screen width float worldScreenWidth = worldScreenHeight / Screen.height * Screen.width; // to scale the game object we divide the world screen width with the // size x of the sprite, and we divide the world screen height with the // size y of the sprite transform.localScale = new Vector3( } } // class
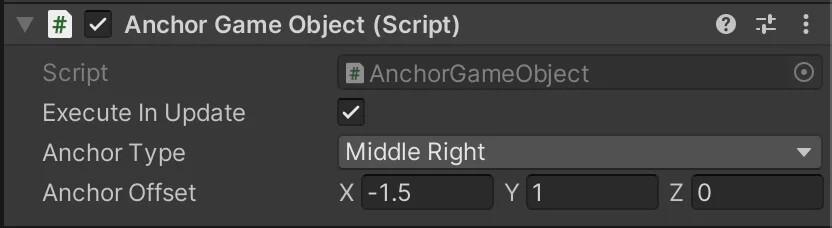
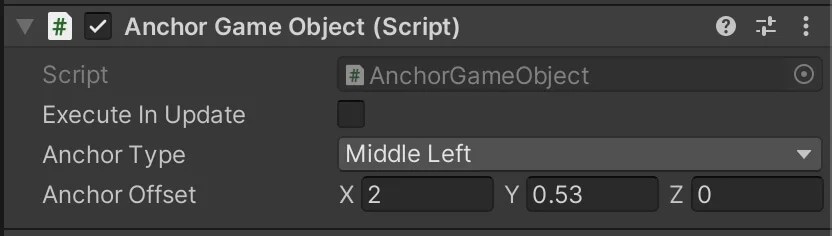
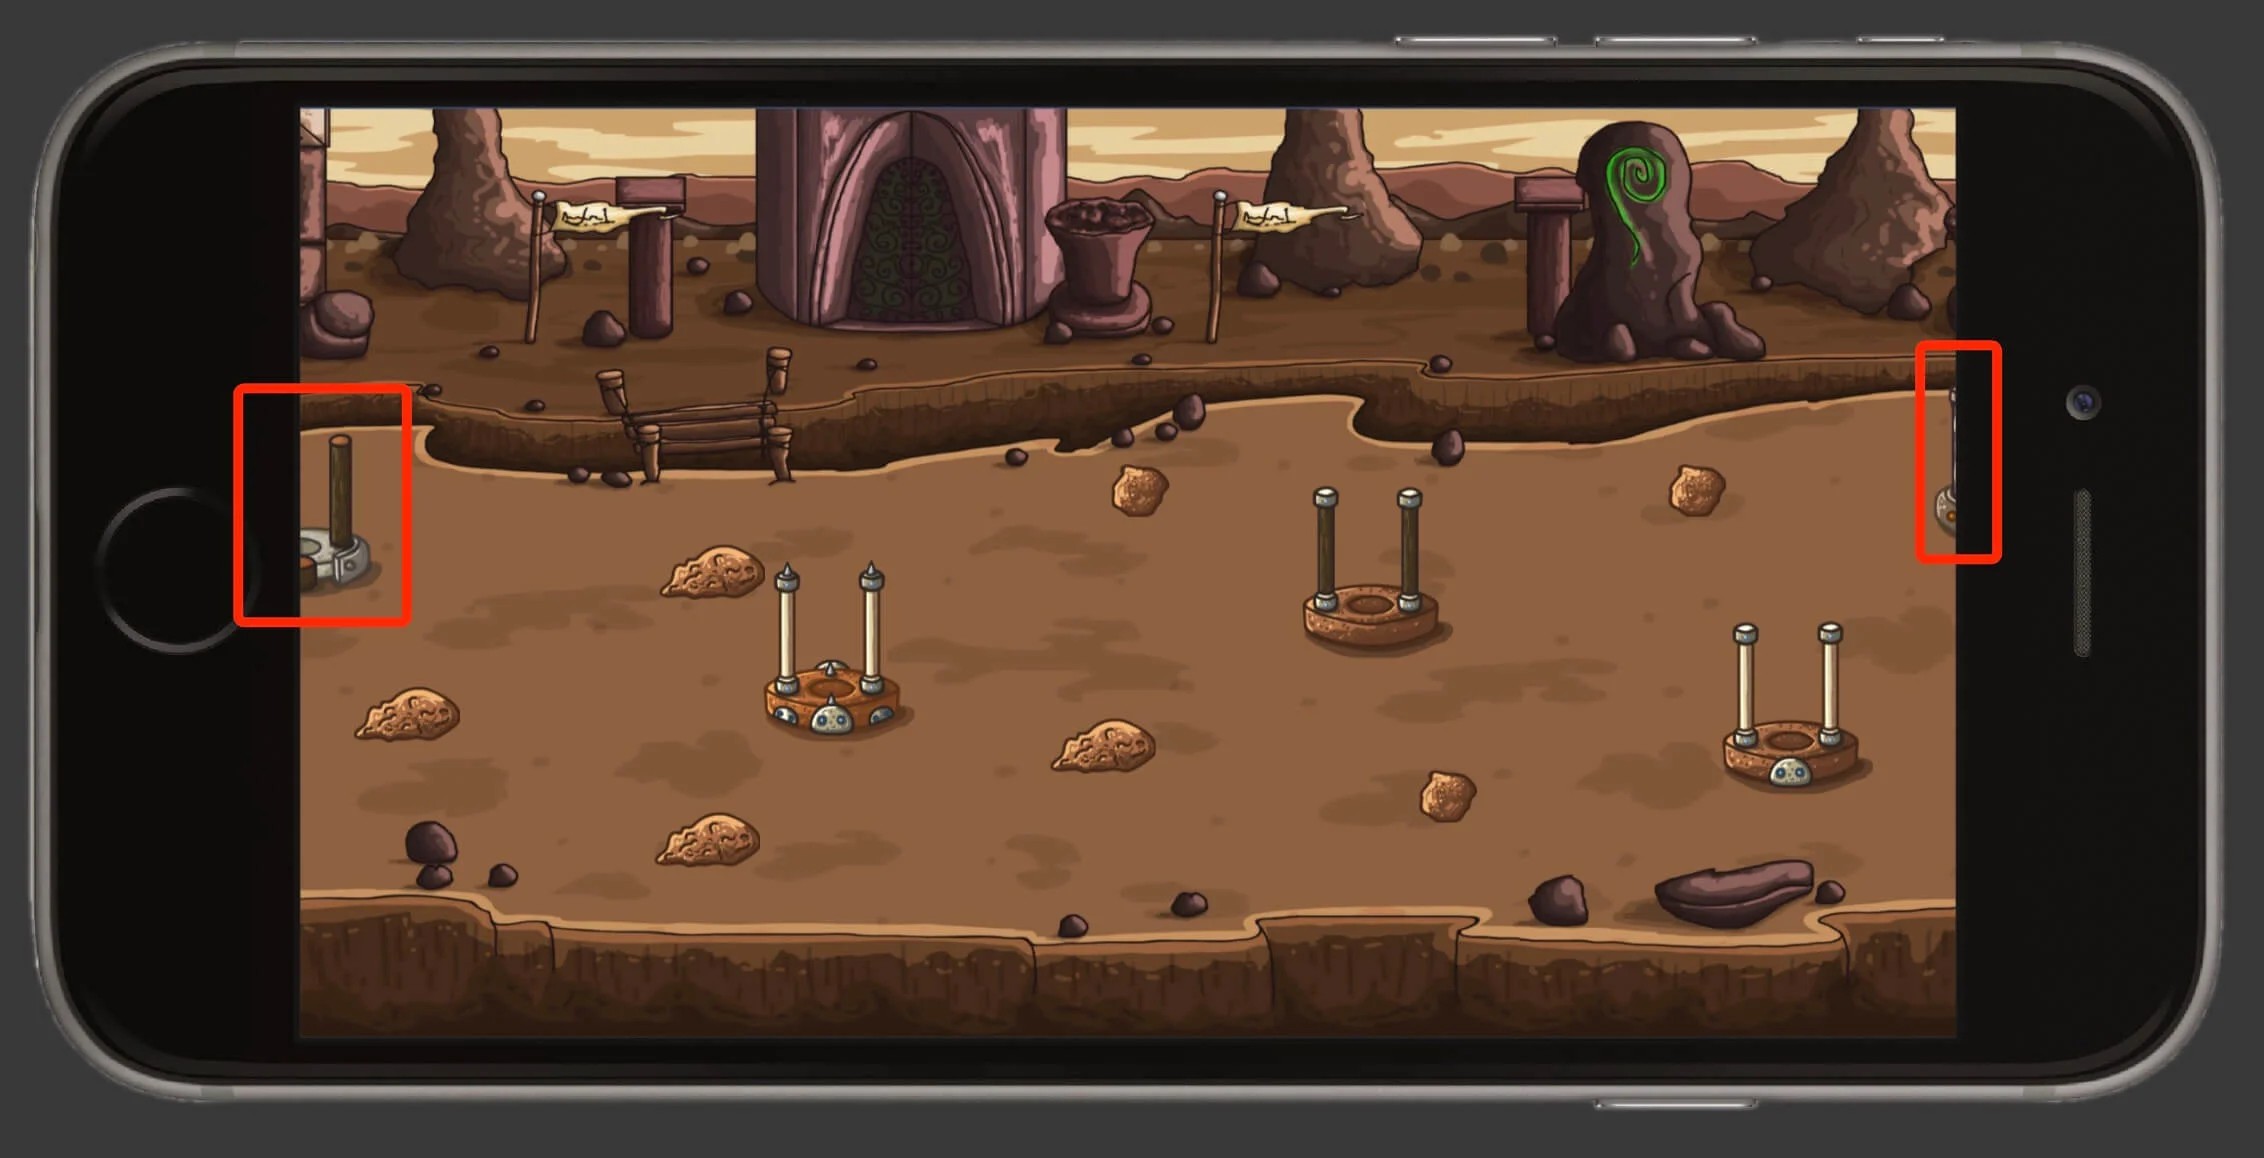
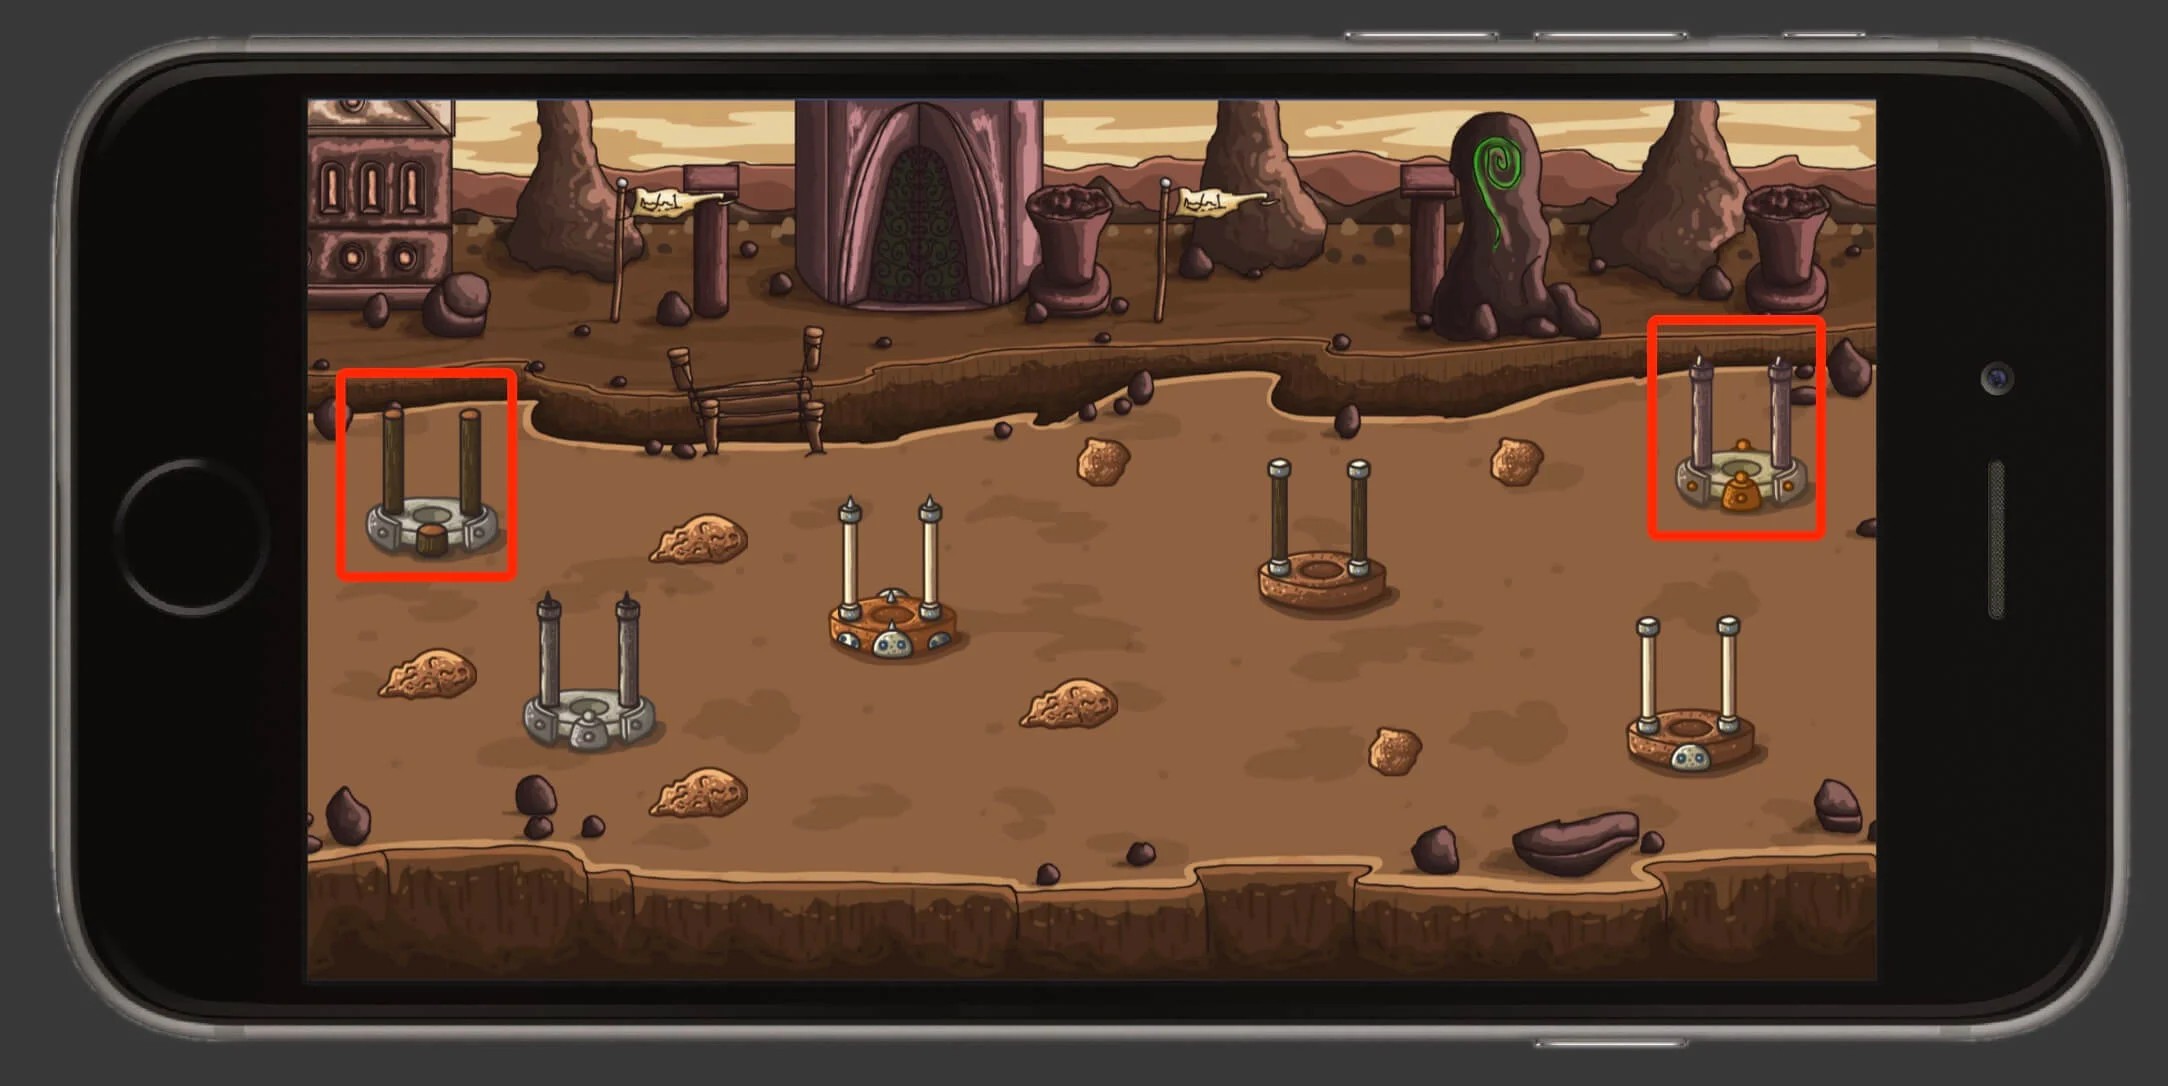
using UnityEngine; using System.Collections; [ExecuteInEditMode] publicclassAnchorGameObject : MonoBehaviour { publicenum AnchorType { BottomLeft, BottomCenter, BottomRight, MiddleLeft, MiddleCenter, MiddleRight, TopLeft, TopCenter, TopRight, }; publicbool executeInUpdate; public AnchorType anchorType; public Vector3 anchorOffset; IEnumerator updateAnchorRoutine; //Coroutine handle so we don't start it if it's already running // Use this for initialization voidStart() { updateAnchorRoutine = UpdateAnchorAsync(); StartCoroutine(updateAnchorRoutine); }
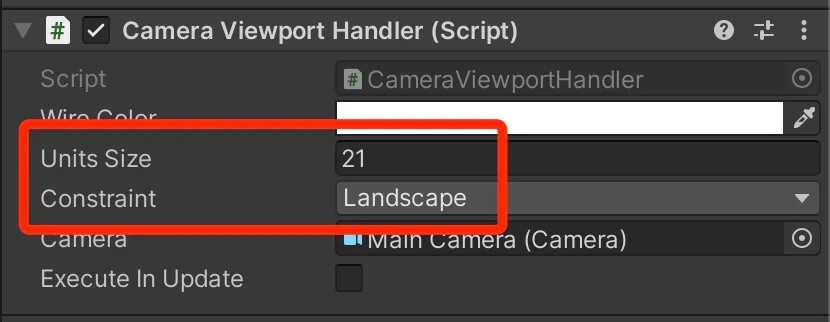
///<summary> /// Coroutine to update the anchor only once CameraFit.Instance is not null. ///</summary> IEnumerator UpdateAnchorAsync() { uint cameraWaitCycles = 0; while (CameraViewportHandler.Instance == null) { ++cameraWaitCycles; yieldreturnnewWaitForEndOfFrame(); }
if (cameraWaitCycles > 0) { print(string.Format("CameraAnchor found CameraFit instance after waiting {0} frame(s). " + "You might want to check that CameraFit has an earlie execution order.", cameraWaitCycles)); } UpdateAnchor(); updateAnchorRoutine = null; }
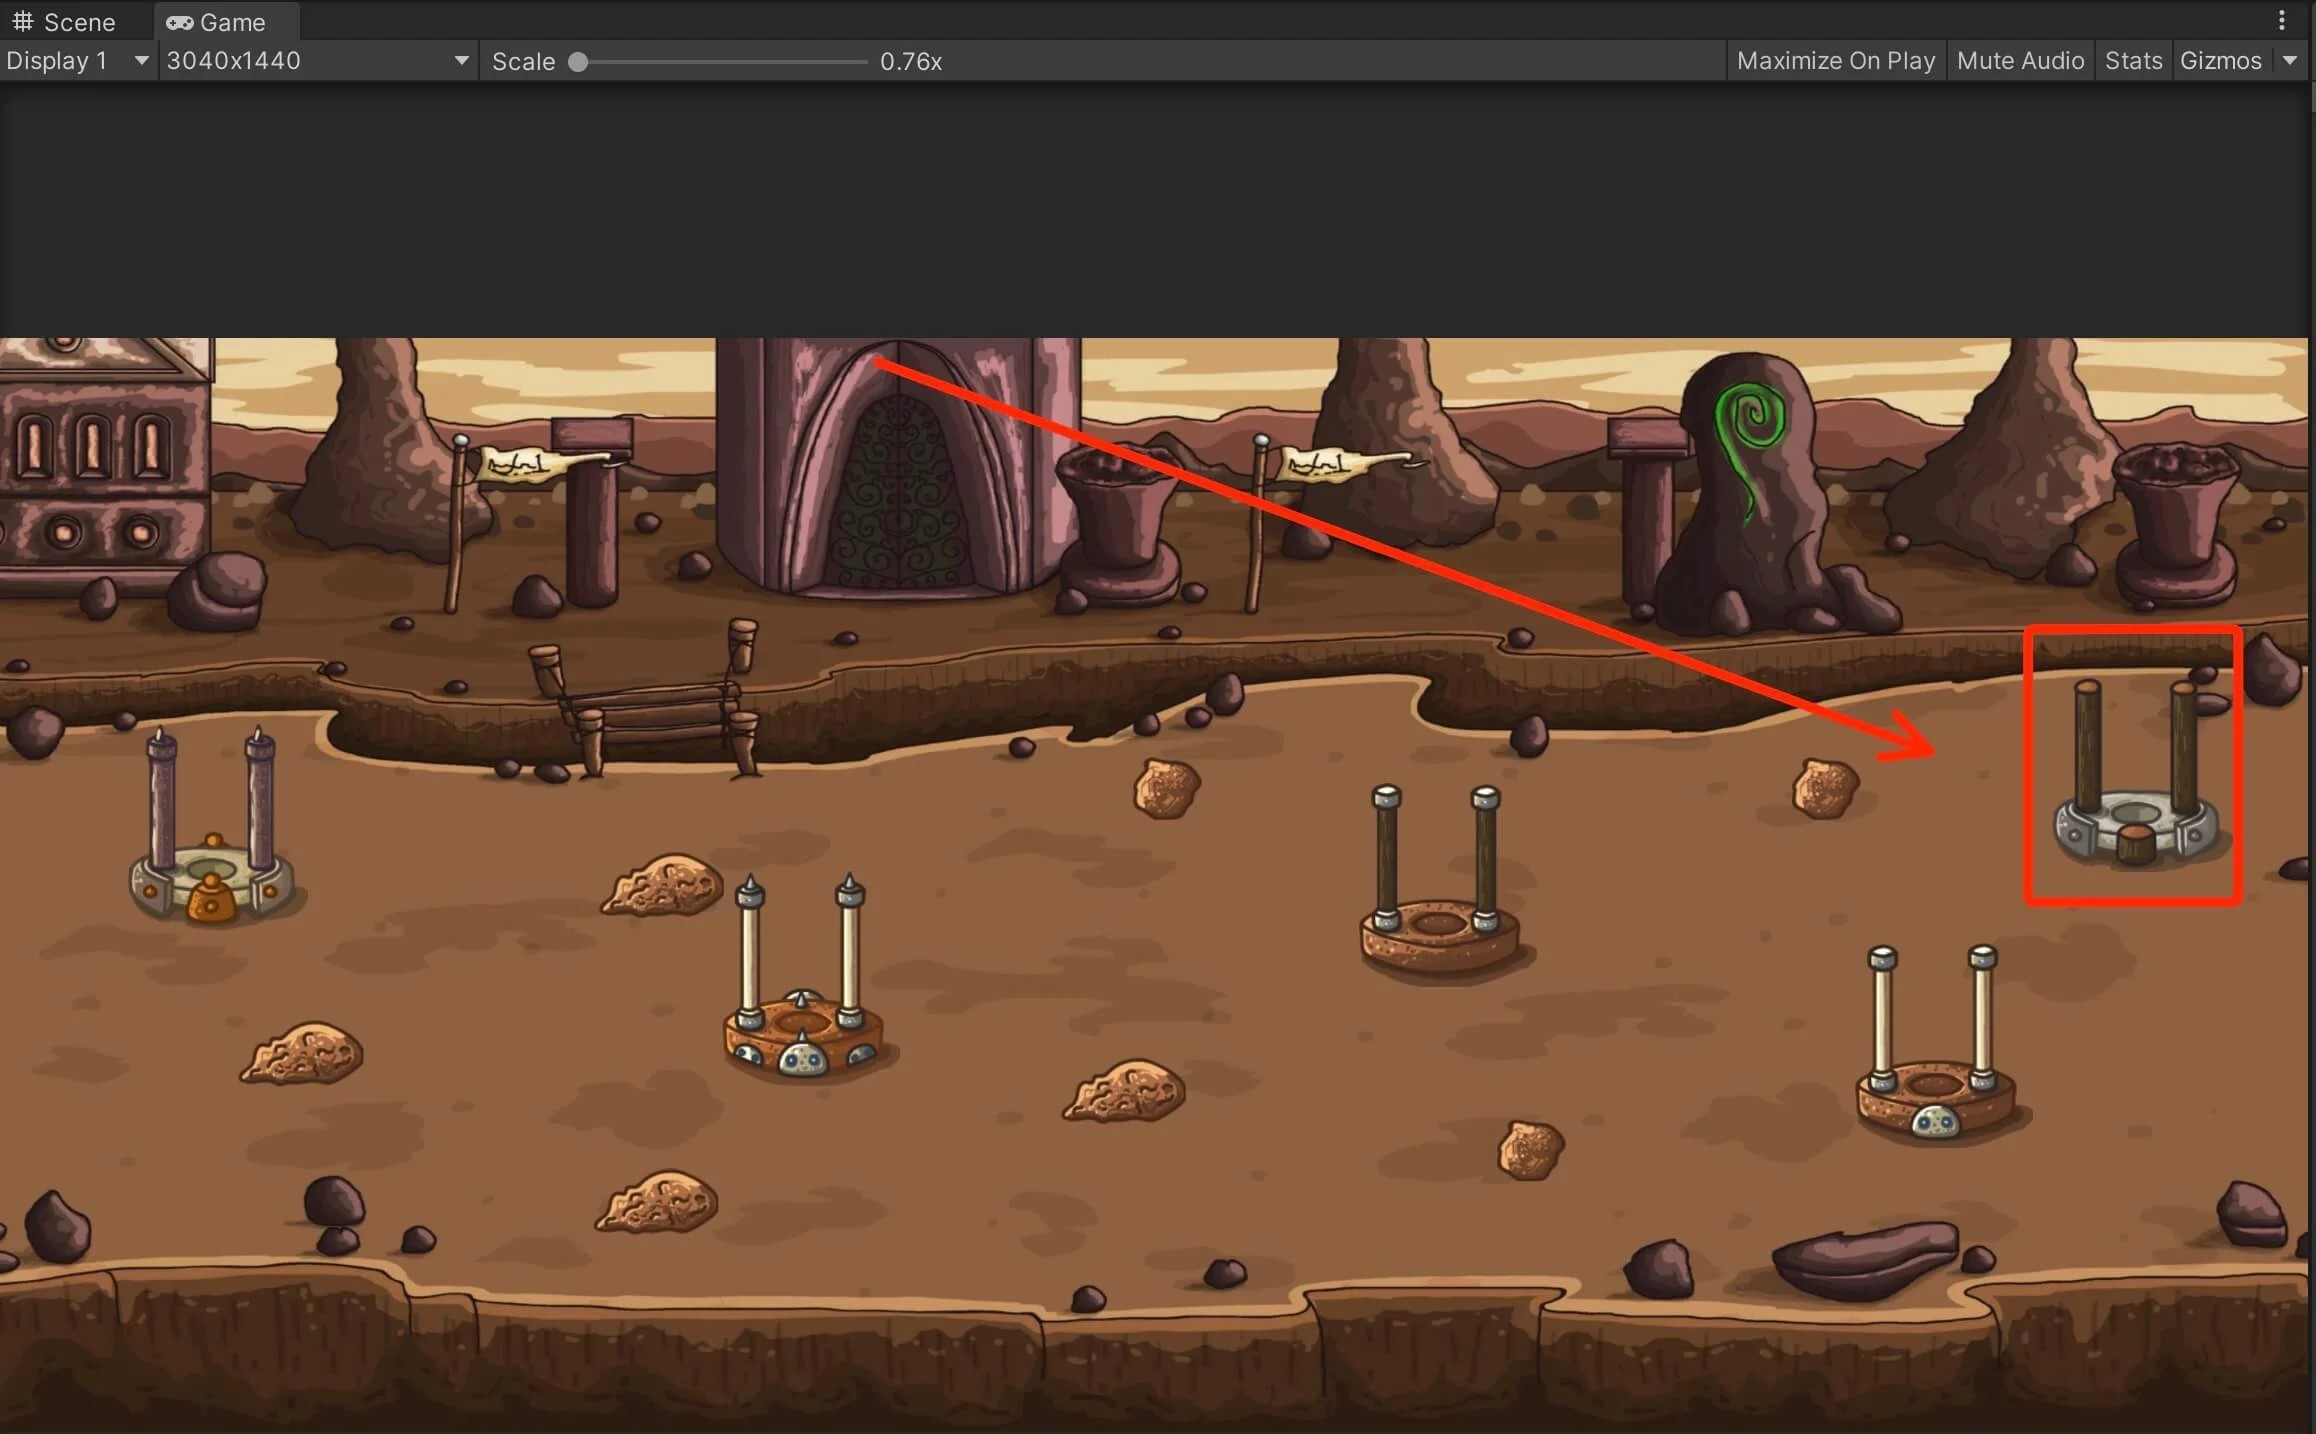
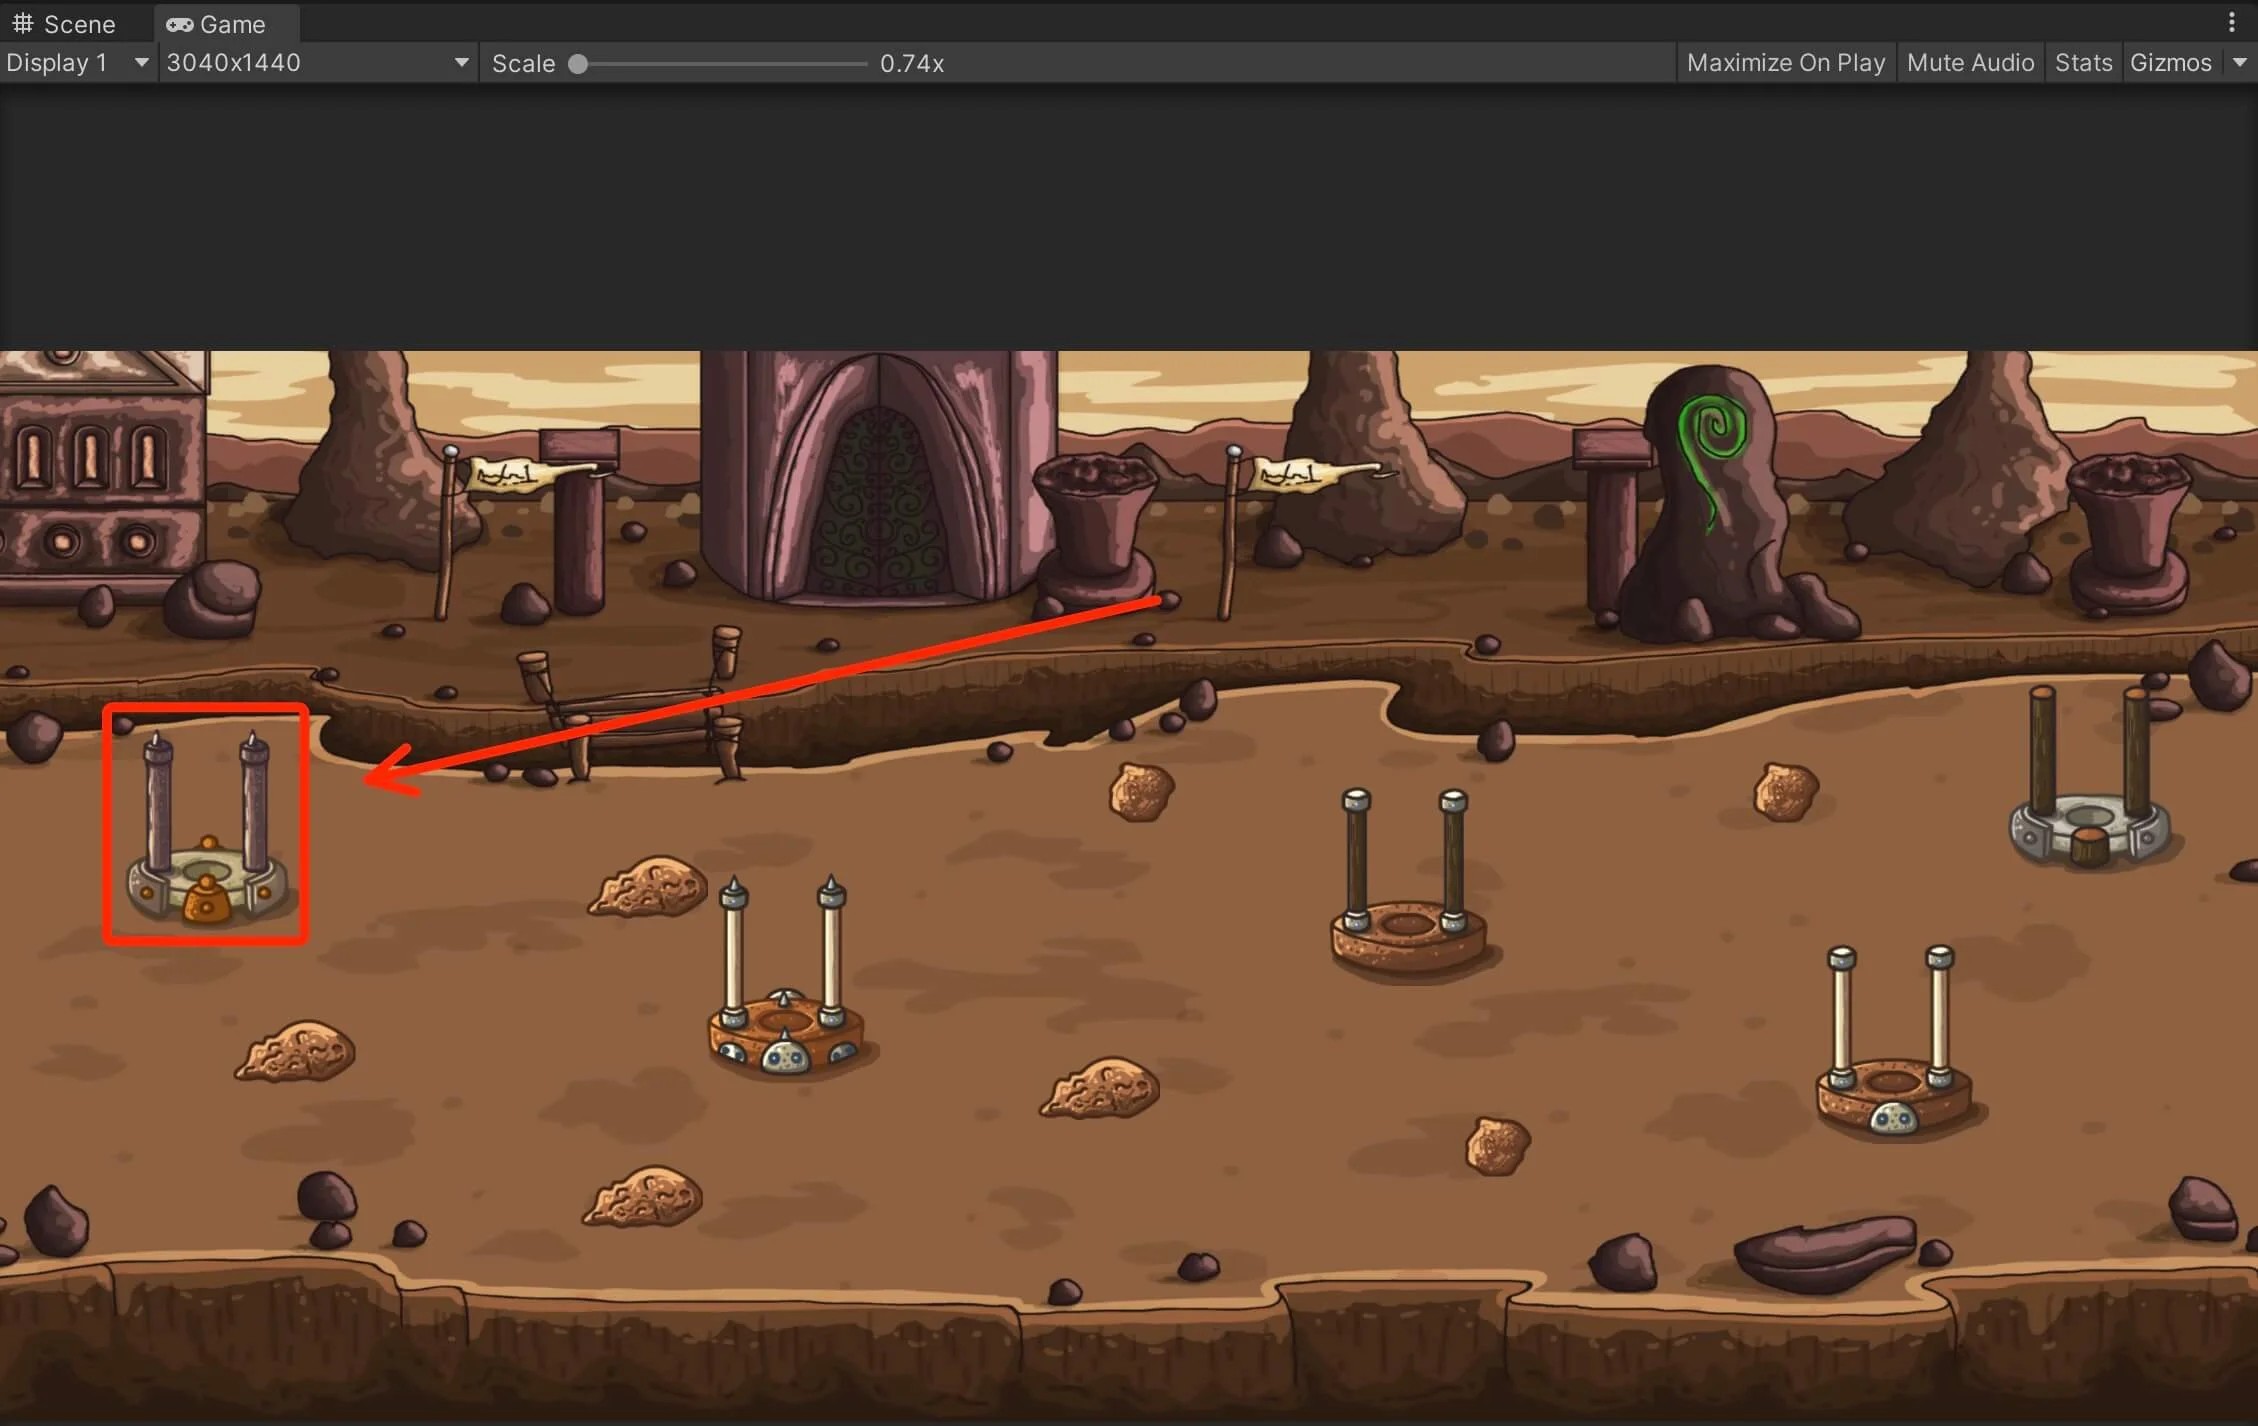
voidUpdateAnchor() { switch (anchorType) { case AnchorType.BottomLeft: SetAnchor(CameraViewportHandler.Instance.BottomLeft); break; case AnchorType.BottomCenter: SetAnchor(CameraViewportHandler.Instance.BottomCenter); break; case AnchorType.BottomRight: SetAnchor(CameraViewportHandler.Instance.BottomRight); break; case AnchorType.MiddleLeft: SetAnchor(CameraViewportHandler.Instance.MiddleLeft); break; case AnchorType.MiddleCenter: SetAnchor(CameraViewportHandler.Instance.MiddleCenter); break; case AnchorType.MiddleRight: SetAnchor(CameraViewportHandler.Instance.MiddleRight); break; case AnchorType.TopLeft: SetAnchor(CameraViewportHandler.Instance.TopLeft); break; case AnchorType.TopCenter: SetAnchor(CameraViewportHandler.Instance.TopCenter); break; case AnchorType.TopRight: SetAnchor(CameraViewportHandler.Instance.TopRight); break; } } voidSetAnchor(Vector3 anchor) { Vector3 newPos = anchor + anchorOffset; if (!transform.position.Equals(newPos)) { transform.position = newPos; } } #if UNITY_EDITOR // Update is called once per frame voidUpdate() { if (updateAnchorRoutine == null && executeInUpdate) { updateAnchorRoutine = UpdateAnchorAsync(); StartCoroutine(updateAnchorRoutine); } } #endif }